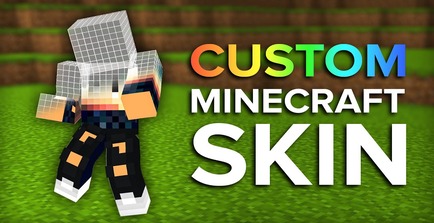
Minecraft has captivated millions of players with its blocky, pixelated world, offering endless possibilities for creativity. One of the ways players can express themselves is by customizing their character’s appearance with unique skins. Creating custom skins allows players to stand out in the vast Minecraft universe. Whether you’re designing your own skin for the first time or looking to improve your process, here are some tips to help you create custom skins efficiently.

Understand the Skin Layout
Before diving into skin creation, it’s essential to understand how Minecraft skins are structured. A Minecraft skin is essentially a 64×64 pixel image, though some older versions use 64×32. The skin is mapped onto the player’s model, with different sections representing various parts of the body like the head, torso, arms, and legs. The layout consists of a front, back, and sides for each body part. Familiarizing yourself with this structure helps you avoid confusion during the design process.
Use Skin Editors
While you can create Minecraft skins from scratch using any graphic design software, using a dedicated skin editor can save time and effort. Tools like Skindex or Nova Skin offer intuitive interfaces specifically designed for Minecraft skin creation. These editors allow you to draw directly on a 3D model of the character, making it easier to visualize how the skin will look in-game. Some editors even offer pre-made templates or allow you to upload your own designs for further customization.
Start with a Template
If you’re new to skin creation, starting with a template is a great way to save time and effort. Templates provide a basic structure, and you can customize them by adding your own details, such as colors, patterns, or accessories. Many Minecraft skin websites offer free templates, which can be modified according to your preferences. This approach allows you to focus on the design rather than worrying about the skin’s proportions and layout.
Keep It Simple
While it can be tempting to create an overly detailed skin, remember that Minecraft’s blocky aesthetic works best with simple, clean designs. Too many intricate details may not show up well in the game, especially when viewed from a distance. Instead, focus on bold colors, clear shapes, and recognizable features. A simple yet striking design can often be more effective than a cluttered one.
Use Layers for Detail
To add depth and texture to your skin, take advantage of the skin’s layers. Minecraft skins support two layers for each body part: the base layer and the outer layer. The base layer is the primary design, while the outer layer can be used for additional details like clothing, accessories, or hair. This layering system allows for more complex designs without overwhelming the skin’s basic structure.
Test Your Skin Regularly
Once you’ve made some progress on your skin, it’s important to test it in Minecraft to see how it looks in-game. Sometimes, what looks good on a flat image may not translate well to the 3D model. By loading your skin into the game frequently, you can make adjustments and ensure that it looks as intended. This step also helps you spot any areas that might need refinement, such as awkward color transitions or misplaced details.
Consider the Backstory or Theme
Adding a backstory or theme to your skin can make the design process more enjoyable and rewarding. Think about the character you want to portray—are they a hero, villain, or adventurer? Are they inspired by a favorite movie, game, or book? Incorporating these elements into your skin can give it more personality and make it stand out. You can also draw inspiration from Minecraft’s mobs, animals, or fantasy themes for a unique twist.
Use High-Quality Tools
While basic graphic design programs like MS Paint can work for skin creation, using more advanced tools can significantly improve your efficiency and the quality of your skin. Programs like Adobe Photoshop or GIMP offer more control over your design, including the ability to use layers, gradients, and other advanced features. These tools can help you achieve a more polished and professional-looking skin.
Pay Attention to Color Harmony
Color plays a crucial role in the overall appearance of your skin. When choosing colors, try to maintain a harmonious palette that complements each other. Avoid using too many contrasting colors, as this can make the skin look chaotic. Instead, opt for a cohesive color scheme that reflects the personality or theme of the character you’re designing. Tools like Adobe Color Wheel or Coolors can help you select complementary colors for a more balanced design.
Save and Share Your Skin
Once you’re happy with your custom skin, save it in PNG format. Minecraft only accepts PNG files for skins, so ensure that your design is saved in the correct format. If you’re proud of your creation, consider sharing it with the Minecraft community. Many websites allow players to upload and share their skins, giving others the chance to download and use your design. Sharing your work can also inspire other players and help you receive feedback to improve your future skins.